Logos
Just in case I ever need it in the future. Made my Logo’s folder public so that I can easily get some logo’s when I need them in the future.
The files are available as .png (16x16, 32x32, 48x48, 64x64...

Vidyano, .NET, HTML5/JavaScript, Japanese, ...
Just in case I ever need it in the future. Made my Logo’s folder public so that I can easily get some logo’s when I need them in the future.
The files are available as .png (16x16, 32x32, 48x48, 64x64...
I’ve been using/buying Bitcoins for a long time, bought my first when they were only € 2/BTC.
Now with the announcement of Paypal supporting Bitcoins I checked the prices again. Finding a place to buy them isn’t really hard...
After 9 years of using WordPress, I’ve finally decided to use another hosting. This time not just a new host/server but actually another technology to host my blog.
Github Pages allows you to host a static pages based...
Google has started offering the .みんな domain. The extension means “everyone” and so it can be used by everyone. ![]()
http://www.youtube.com/watch?v=5FmLnNDw23Y
More information can be found at http://はじめよう.みんな/index.html
This current blog is now also available as http://スティーブ.みんな...
見ての3月間後、私は、現在のすべてのワンピースエピソードを見ました。
ワンピースは海賊についてアニメです。ルフィはむぎわら海賊のせんちょうです。

ルフィはいつも元気でおもしろいです。そして、かれは一人ではありません。たくさんなかまいます。
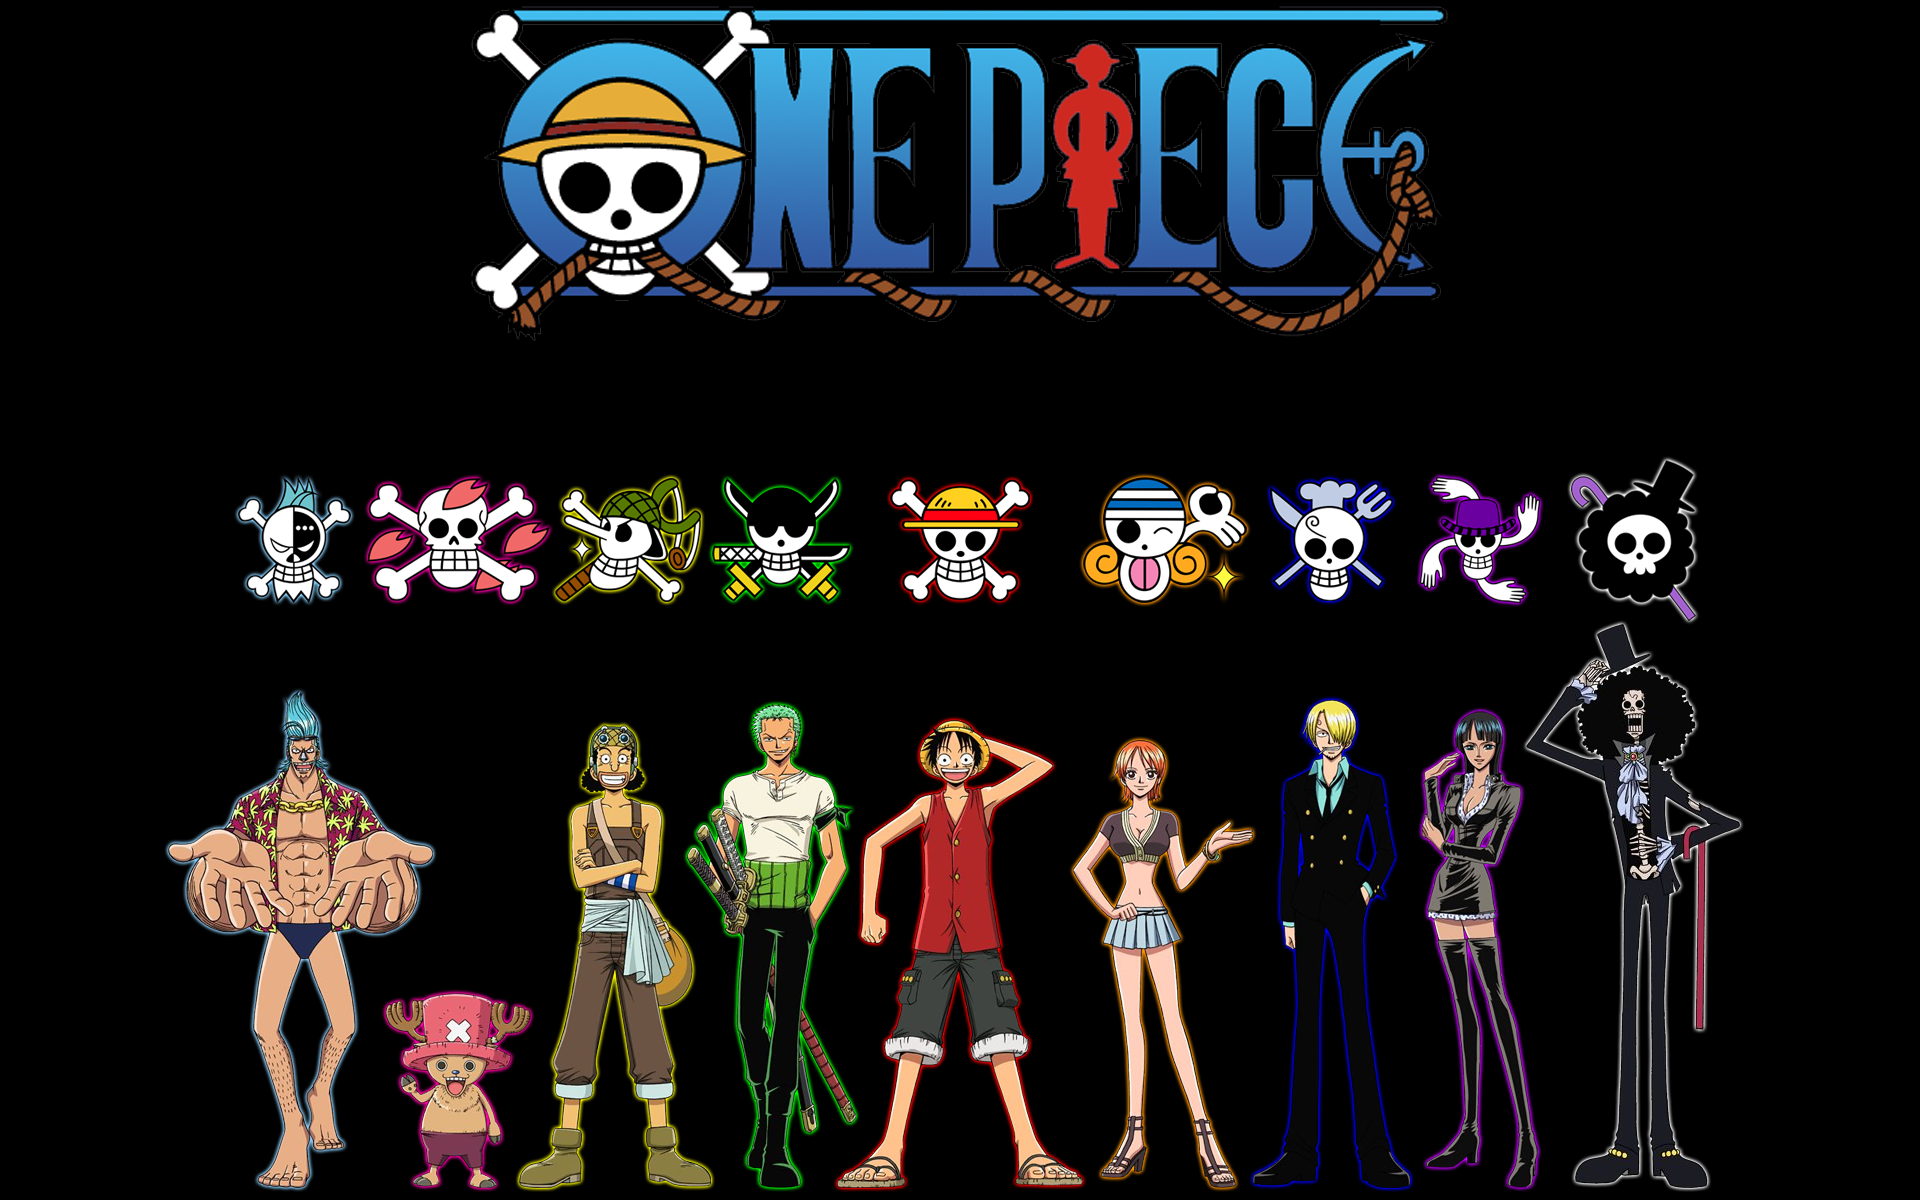
9人はいます。フランキーさんとチョッパーさんとウソップさんとゾロさんとルフィさんとナミさんとサンジさんとロビンさんとブルックさんはいます。
We’ve updated our Vidyano extension on the Visual Studio Gallery and on GitHub (Commit 2838609)
On the client side we have some nice improvements:
After the announcement of David Fowler about the new release of SignalR, I had to try it out on my Learning Japanese web app (latest commit). I’ve started with basic chat app and added some Vidyano related calls...
Boris Yankov has started collecting TypeScript type defintions for popular JavaScript libraries. These files (ending in .d.ts) describe the public api of an existing library, just like .h files do for C code. This allows you to write TypeScript code...
For other people in the Antwerp area, next week (17th of November) we have the next Nihongo Hanasoukai (日本語を話そう会). It’s organised each month and it’s for both native Japanese speakers and people learning Japanese. It’s just 2 hours and costs...
This is another must have extension for any Web developer using Visual Studio 2012. It is updated regularly (a lot, like weekly) and they keep adding support for all the latest Web related technologies (TypeScript was added within a week).
...As you know I have my little test site on Appharbor http://vidyano.apphb.com/#!/KanjiOverview
The Kanji data came from a SQL server database with an order by on the Kanji character. But once I cached the query (automatically refreshed every 30...
Finally got some time to check out TypeScript. The first impressions are good, all current JavaScript is automatically valid TypeScript! This allows you to easily update existing JavaScript code step by step.
The resulting generated JavaScript is also easy read...
With each Visual Studio version we get more and more useful keyboard shortcuts, I know there are a lot of cheat sheets posters, etc but wouldn’t it be easier that they are just shown while you are working in Visual...
Unless you’ve been living under a rock you’ll have heard about the Azure Websites that’s available from Microsoft. You can start by using a shared environment and then scale as traffic grows.
Scott Hanselman has confirmed that they now support...
NuGet packages are getting really popular for distributing libraries. But I found out that they can also be used to distribute C# code.
This can be very useful to share those “small” libraries with extension methods or other commong code,...
We have pushed the latest Vidyano version on the Visual Studio Gallery. We’ve added so many features that I better just link to our Features page ![]()
But one of them is the new...
After finishing my first year in Japanese, I decided to continue with a second year. I’ll actually be starting in 3rd year because we finished our beak in one year and the new school normally takes 2 years to finish...
Wim has created his own blog on the new Windows Azure websites: http://reymen.azurewebsites.net/
It already has some amazing Vidyano related posts on it.
Our team is proud to announce the release of version 3.2
What’s new
We are having a seminar here in Belgium next month (Thu, 3rd May 2012) together with Microsoft showing how you can use Vidyano with Windows Azure and show all the benefits of both ![]()
Register here
Learning a new language requires lots of practice so it’s always useful to use it as a much as possible and in different circumstances. As a developer this means creating an application to keep track of stuff ![]()
Sharing this...
Our team has been hard at work to release version 3.1
What’s new:
We decided to also use a new blog for Vidyano. This will allow us to post some of the ideas or difficulties we had when implementing some of our features, features or questions we got from our users or when...
I’m proud to announce the release of our third version of Vidyano. This version we focused on the integration with the cloud, so you can take your application and publish it to the cloud without having to make a single...
A new version has been released (download here) of this must have WPF utility. The biggest change is that you can drop a crosshair in the application that you want to snoop so that you no longer have to...
Here’s to a happy new year ![]()
With images it is sometimes difficult to see the difference between a white and transparent background. Using a DrawingBush in Tile mode can create the known checker background used in applications as Photoshop.
<DrawingBrush> <DrawingBrush.Drawing>...For my Resizer application I wanted a toolbar with image buttons, everything was perfect until I tried to disable the buttons. The first idea was to add a greyscale effect to the button if it was disabled. For a...
We have updated the Getting Started tutorial and placed it on our Wiki.
Microsoft changed the default behaviour for scaling images with WPF 4.0/.NET 4.0.
They opted for a faster but less accurate scaling algorithm named Linear instead of the default Fant that was used in WPF 3.0.
You can change this...
I’ve been working on a little project to demo the features of Vidyano.
It’s used internally to generate the thumbnails for our Wiki. The source code is available...
iRail.be is a website to find train information here in Belgium, it scraped the original complicated website of the NMBS and provided a clean/simple interface to access the information.
More info on the blogpost.
I’m proud to announce that our team has finished our next major version of Vidyano.
Build from scratch to optimize everything for the latest .NET 4.0 release and using all latest features of it (MEF, Rx, …).
The...
Some updated download links for the latest .NET version:
Ruby on Rails allows you to use ‘dynamic’ finders to query the database. This is actually a feature from ActiveRecord to dynamicly use methods which will represent where clauses on the database.
Some examples:
User.find(:first, :conditions => ["name...
UPDATE: Vidyano 2.0 released
The Vidyano Release Candidate is now available ![]()
Together with a new website we offer complete support now for any application build with Vidyano, think of it as a Go Live license.
...We released the latest version of Vidyano last night.
A lot of new features have been added to this release, here are just a couple:
UPDATE: .NET 4.0 Links
You can download it here:
Didn’t even know it was possible but it seems like Expression Blend supports AddIns. And Stefan implemented to feature I was missing the most in Blend: IntelliSense!
You can get the Add-In at his blog.
David has made a complete step-by-step getting started for Vidyano.
You can get more information at our blog.
The download contains the document as a .doc file or a .xps file, and it also contains the complete result so...
After so many months of coding we finally got a release ready for the public ![]()
I present our July CTP, you can get it from our team blog.
It’s a long time since I posted something, have been working on our latest product and it’s finally getting ready for the big public to see ![]()
We have put a screencast online to give a first look at...
Well actually it’s a VPS (Virtual Private Server), I can now do whatever I want with it. Yes, I can even make it crash completely (been there done that).
I’ve got 256MB of memory for myself, and 10GB of storage....
And a happy 2008 to everyone
Just wanted to wish everyone a happy 2007 ![]()
I finally got the demo online, you can download it at our forums. If you have installed all the required tools it should work without a problem. I’ve added an attached database file so just installing SqlServer 2005...
I’ve been working MVP for a day now and I just love it. Complete seperation of data and user interface. I’ve been creating 2 models, one built with Ado.NET (which sucks by the way) and one built with
Read More
Here is a small part of my Demo that I’m creating. It is actually a second Presenter with Model and View that are used when you want to import something (the demo will follow so don’t worry Somebody mailed me that I should look into the MVP pattern (did I mention I love patterns! So after some browsing on the web it sure looks like the right pattern to use for my last problem. MVP... A few days ago a friend of mine asked me the following. He was working on a program with a database backend. He found some ORM tools on the web, but every time they worked differently (use that or that... Just finished the first 4 chapters for school, converted all the code to C# and well I have to admit that I used more patterns before then I realized. One of the patterns that I don’t really like is the... Just saw The Brothers Grimm yesterday. It was a *special* movie It’s about the 2 brothers Will and Jake, lots of “fairy tales” in it, if not with a certain twist to it We have a new course at school this year, Design Patterns & Frameworks We had to buy the book Just found a pretty cool program today. The great thing about this program is that it uses an online dictionary (based on some sort of hashing) to detect the files.Model-View-Presenter Sample
Read More
![]() ).It gives...
).It gives...Model-View-Presenter
Read More
![]() )
)Seperating data from user interface
Read More
Patterns in C#
Read More
The Brothers Grimm
Read More
![]()
![]()
Had its boring...Design Patterns
I’ve been coding OO code for about 2 years now and I’ve been using some patterns without knowing it.MusicBrainz Tagger & Album Art Fixer
Read More
It’s called MusicBrainz Tagger (Website)
It can...